Ready to learn how to change your primary domain on WordPress? Things can get a little technical here, but by following these steps closely, the process will be seamless.
1. Change the Domain in WordPress
Log into your WordPress account, and from the dashboard, go to Settings > General. Change both the WordPress Address and Site Address to your new domain name, then save.
2. Update the wp-config.php
What is the wp-config.php? This is a crucial file in your WordPress installation that contains important data and configuration information from your website.
To access and update this with your new domain, you’ll need to find your FTP credentials from your hosting provider. Once you have access to the FTP, go to public_html > wp-config.php, then right-click the file and select Edit. What you will see is:
define(‘WP_HOME’,’http://yoursitename.com’);
define(‘WP_SITEURL’,’http://yoursitename.com’);
Change ‘yoursitename’ to the new domain name, then save.
3. Update the WordPress Database
Go to your hosting control panel and find phpMyAdmin. Find wp_options, then type your new domain into ‘siteurl’ and ‘home’. Click Go to save.
4. Redirect the Former Domain
It’s time to ensure your old website is redirected to the new website, as audiences might still stumble upon your old URL or forget that you’ve changed to a new domain. By redirecting, they can type in the old domain and still end up on your new domain.
To set up these 301 redirects, as they are called, go to your hosting control panel and choose the file manager. Go to the .htaccess folder, and right-click to edit. Add the following code, changing ‘newdomain’ to your new domain, to the top of the page:
#Options +FollowSymLinks
RewriteEngine on
RewriteRule ^(.*)$ http://www.newdomain.com/$1 [R=301,L]
5. Notify Search Engines
Search engines, particularly Google, have tools to change your site address. You’ll fill out a simple form to notify search engines of the change, so they can direct search traffic to your new domain name. Make sure you fulfill the requirements for Google here, then access the Change of Address tool here.
WordPress Change Domain Plugins
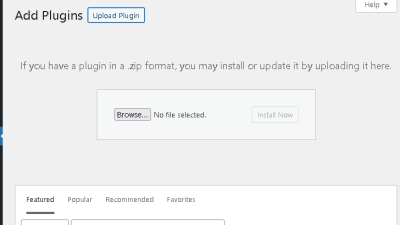
Need help backing up your website or redirecting your URLs? There’s a plugin for that! Here are some popular options that can help you with these tasks and more as you handle your WordPress domain change.
1. Duplicator
Duplicator is a top-rated plugin for WordPress migrations and backups. You can easily backup your site and move your website, and this tool is especially helpful if you’ll also be switching hosts during your domain change. Duplicator will download your entire WordPress site — plugins, themes, and all — into a .zip file as a backup or for simplified migrations with no downtime.
2. Redirection
The aptly named Redirection plugin makes light work of 301 redirects. It also tracks 404 errors to make sure your website isn’t suffering in search rankings due to broken links, domain change-related or not. Down the line, you might also find other reasons for redirects, and this plugin allows for conditional redirects.
3. Backup Guard
Another option for backups and migrations, Backup Guard offers backup and restore functionality for your website’s files. If you upgrade to the premium version, Backup Guard will also handle migrating your website from one domain to another, making the process a piece of cake.
Follow These Tips for a Stress-Free WordPress Domain Change
No matter the reason, changing a domain name can feel stressful. Even just finding a new domain can be a process in-and-of itself.
But with a little preparation and this guide on handling WordPress domain changes, you can have your new domain set up in no time — regardless of whether you do everything manually, or install a plugin to lend you a hand.